News
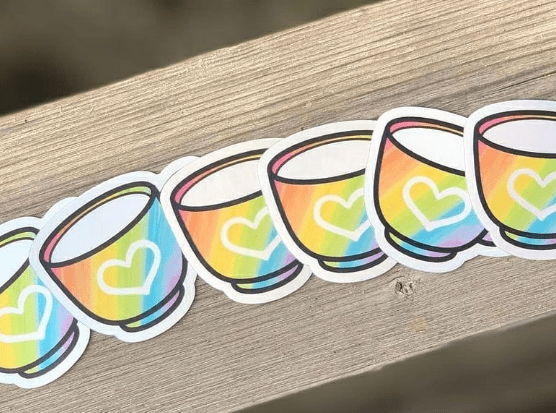
Save the Date Magnets: Excite Guests with a New Twist on Invitations
Considered to be the pre-invitation for events, Save the Date announcements are a popular way to make sure guests have early notice. There are many options when creating these cards. One that sticks out, literally, is Save the Date magnets.
Learn more
Stay Safe and Showcase Branding with Stickers for Hard Hats and Construction Safety Helmets
Hard hats and construction safety helmets play a critical role in protecting workers. They also make a perfect canvas for stickers. Stickers for hard hats and construction safety helmets elevate it from just another piece of safety gear. You can create custom stickers that have meaning for your brand and crew.
Learn moreSticker Swapping: Why Exchanging Stickers Is Fun and Good for Business
If you haven’t heard of sticker swapping, you can easily draw parallels back to your youth of trading cards. A sticker swap is a simple exchange of branded stickers. It’s a popular exercise for small businesses, woodworkers and other groups.
Learn more5 Ways You Can Display Your Sticker Collection
Sticker collections aren’t just for kids! While we all remember the “sticker books” from our childhood, now the possibilities are endless to show off the stickers that are a sign of your personality, interests, and fandom. So, what are the best ways to display your sticker collection? We’ve got lots of creative ideas ahead.
Learn more
Running an Effective Sticker Marketing Campaign
Learn to use stickers as part of a marketing campaign. Discover different types of advertising stickers and strategies for using them most effectively.
Learn moreHow to Get Stickers Off a Laptop Safely
Laptop stickers are a great way to add some personality to your device, but when it's time to remove them, they often leave behind a stubborn adhesive residue that can spoil the sleek look of your tech. This sticky leftover can be a hassle to get rid of, and it's easy to feel frustrated trying to restore your laptop’s smooth surface. Not only does it look messy, but the residue can also attract dirt and dust, making your computer look grimy. Let’s explore some simple and effective ways to remove sticky residue and restore your laptop’s original shine. Why Sticker Adhesive Is Difficult To Remove Sticker adhesive can be notoriously stubborn for a couple of reasons. First, the adhesive is often made from a blend of synthetic polymers that create a strong bond, allowing it to adhere firmly to surfaces like plastic or metal on laptops. This means you're not just tearing paper when you try to peel a sticker off, you're also battling a bond that was specifically designed to stick and withstand wear and tear. Additionally, the heat and pressure generated from normal laptop use can strengthen this bond over time, making it even more challenging to eliminate the residue. Moreover, as the adhesive dries, it can become harder to peel off. Trying to remove this residue can feel like an unwelcome exercise in patience, often leading to the risk of damaging the finish of your laptop if you're not careful. Many of us can relate to this frustrating situation. Choosing the Right Tools Removing sticker adhesive doesn’t have to be a hassle if you have the right tools. Products like Goo Gone or rubbing alcohol can help break down sticky residue without harming your laptop’s finish. Using a soft microfiber cloth alongside these solutions lets you wipe away the mess gently, minimizing the chance of scratches. For a creative alternative, a simple pencil eraser can work surprisingly well. The rubber lifts residue without the need for harsh chemicals. The key is to clean your laptop carefully, preserving its surface while removing the adhesive. With the right approach, you’ll renew your laptop’s sleek look and help it stay in excellent condition for years to come. Step-By-Step Guide To Removing Stickers From Your Laptop Whether it’s a promotional sticker or just an old label you want to get rid of, the sticky residue can diminish your device's appearance and make it difficult to keep clean. Fortunately, with a few simple techniques and the right materials, you can restore your laptop’s surface to its original shine. Here is a step-by-step guide to removing plastic stickers from your computer: Gather your supplies: Start by collecting your materials. You'll need a soft microfiber cloth, a bottle of Goo Gone or rubbing alcohol, and optional items like a pencil eraser or a warm, damp cloth. Setting the stage ensures you won’t have to scramble mid-process. Test a small area: Before diving in, apply a small amount of your chosen adhesive remover to a discreet spot on your laptop to ensure there isn’t a reaction. This quick test can prevent your laptop’s finish from unforeseen damage. Apply the solution: Pour a small amount of Goo Gone or rubbing alcohol onto your microfiber cloth — not directly onto the laptop. This helps control the amount of liquid you're using and minimizes the risk of excess spilling. Gently rub the area: With the dampened cloth, gently rub the sticky area in a circular motion. Patience is key here; it allows the solution to penetrate the adhesive without applying too much pressure. You want to dissolve the glue, not scratch your laptop. Wipe off residue: As the adhesive starts to lift, take a clean part of the microfiber cloth and gently wipe away the gooey mess. If you notice any stubborn bits, don’t hesitate to reapply the solution and repeat the rubbing process. Finishing touches: Once the sticker residue is removed, wipe the area with a warm, damp cloth to remove any leftover adhesive remover. Finally, dry the surface with a clean microfiber cloth and stand back to admire your laptop’s newfound shine. These simple steps make it easy to remove sticker adhesive while protecting your laptop’s finish. With the right tools and a little patience, you can restore its sleek, polished surface and keep it looking as good as new. Watch the video below to learn how to properly remove a sticker from your laptop. https://www.youtube.com/watch?v=AMkvj78KOcs Tips for Removing Stubborn Adhesive For stubborn adhesives that won’t budge with standard methods, a hairdryer can be a game-changer. Applying gentle heat for a few seconds softens the residue, making it easier to peel or wipe away. Specialized adhesive removers, like adhesive wipes, are another great option since they contain powerful solvents designed to tackle tough, sticky messes. A plastic scraper or an old credit card can also help lift the adhesive after applying the remover. Just be sure to use a light touch to avoid scratching your laptop’s surface. If you prefer natural solutions, a simple mix of vinegar and water can break down the residue without the need for commercial products. As always, test any method on a small, inconspicuous area first to ensure it’s safe for your device. Preventing Future Sticker Adhesive Issues on Laptops When decorating your laptop, selecting the right stickers can save you a lot of hassle. Before purchasing, look for stickers labeled "removable" or "repositionable." These stickers are designed to peel off cleanly without leaving behind any sticky residue, making your life much easier later on. High-quality brands will offer die cut stickers that are easy to remove. Glitter stickers can also be a beautiful and playful option. Many are crafted from materials that won’t damage your laptop's surface or that are impossible to remove. Another tip is to avoid heavy-duty adhesives often found on promotional stickers. These can be a nightmare to deal with. Instead, support local artists or small businesses that offer high-quality stickers, as they’re more likely to prioritize user-friendly removal. By choosing wisely, you can enjoy enhancing your laptop's appearance without the anxiety of tedious residue cleanup later. Cleaning Your Laptop After Sticker Removal Thoroughly cleaning your laptop after removing sticker residue is a key step in keeping it looking and functioning at its best. Leftover cleaning solutions can sometimes leave behind streaks or damage sensitive components, ruining the sleek appearance you worked so hard to restore. Nothing is worse than tackling sticky residue only to find cloudy marks or spots left behind. A microfiber cloth is perfect for achieving a smooth, scratch-free finish. It’s gentle on your laptop’s surface, making it ideal for cleaning up after a sticky mess. Pair it with a mild cleaning solution, like distilled water and vinegar, to remove any lingering residue without risking damage. This approach leaves your laptop looking polished and tidy, and it gives you peace of mind, knowing your device is clean and safe. A little extra care ensures your computer is ready to shine, whether you’re working, gaming, or heading out on your next adventure.
Learn moreBarcode Labels: What Are They and How Can Your Business Use Them?
Find out what barcode labels are and how businesses use them for registering pricing to inventory management. Get your barcode labels from Stickerbeat.
Learn moreWaterproof Window Decals Stay in Place and Look Great
One of the most important attributes of a window decal is its durability. The last thing you want is for these labels to lose adhesion due to moisture. Waterproof window decals will ensure that no matter where you place them, they’ll continue to function as they should and show off your brand. What makes a Window Decal Waterproof? There are several areas of waterproof decals worth evaluating. First, they should be made from 3M vinyl, which has a 3.2mil thick block-out bubble-free adhesive. It’s permanent but also removable with no residue. Second, they have a UV layer of lamination to protect from fading from the sun or scratches. Third, they have a backing liner with a silicon coat. This feature allows for easy removal of the sticker from the liner. Fourth, the ink matters as well. It’s non-soluble, so colors remain bold. The last part is the waterproof adhesive that can withstand all weather elements, and you can clean the decals as you do the glass without concerns they’ll begin to curl up on the ends. They have a five-year life expectancy. From how they stay put to the printing process, you can expect these labels to remain in place and look great. How Can You Use Waterproof Window Decals? These window decals are great for company branding, featuring your business name, logo, contact details, and more. You could also design the labels for specific promotions, holiday or seasonal messages, business hours, and more. Because they are affordable and professional, they can immediately grab the attention of anyone who sees them. There are various ways to apply them, including: Cars and trucks: Attach them to the exterior of the window, and they’ll sit tight, no matter the weather. They’ll stay stuck even through rainstorms or a spin through the car wash. Doors: Place decals on your glass doors, and don’t worry about exposure. Windows: Adhere them to your business’ windows. What Are the Specs for Waterproof Window Decals? We print our waterproof decals on premium 4M gloss or matte vinyl. They come in a variety of standard sizes, from 10x10 to 24x24, but you can customize the exact size you need. You can upload your own custom artwork, which our graphic designers will review for any issues at no cost. Then you’ll receive your proof, and once approved, production begins. Ready to Order Your Waterproof Window Decals? If you want to make an impression with branded graphics, windows are an essential place to put them. By ordering waterproof decals, you can feel confident they’ll last for some time. Start shopping today. Also, check out our variety of custom decals.
Learn moreDelightful Ideas for Cupcake Packaging Labels
Cupcakes are an American favorite. They originated over 100 years ago, earning their name for two reasons. First, the “cup” part likely stems from the original ingredients (cup of flour, butter, sugar, etc.). Second, bakers originally baked them in cups. These sweet treats were easy to make and required less effort than a cake. Now, they’re a billion-dollar industry, and their individual packaging makes them ideal for branded labels. Cupcake packaging labels offer many opportunities to engage the person about to enjoy their delectable dessert. Cupcake Labels: The Basics If your cupcakes are a commercial product sold in bakeries, coffee shops, restaurants, or other places of business, your state may require certain information. A good source is the FDA Food Labeling Guide. In most cases, you’ll need to include: Company name and address Ingredients listed by weight in descending order Allergen information (i.e., nuts) Expiration or “best by” date Nutritional information isn’t always necessary, but you’ll need to check what rules apply to your product. Customize the Label to Be a Brand Beacon Your brand is just as important as how delicious your cupcakes are. A label is a great place to accentuate it with your logo, color, and other elements. It’s a calling card; what’s left behind after the cupcake is gone. If it’s memorable and professional, your customers are more likely to remember you whenever they need cupcakes. While you can certainly print labels at home, they won’t be of the highest quality. As perfect as you want your cupcakes to be, your labels need the same care. Plus, you’ll waste time and effort trying to get them right when professionally printed labels are already cost-effective. Other Ideas for Cupcake Packaging Labels You’ll probably need multiple cupcake labels if you sell them individually and in quantity. The former will be smaller and have less space to add other messaging. However, you can do a secondary label that describes the flavor or the specific name of that cupcake if your menu includes these. For the larger labels, consider adding your company website and social media handles. You could even promote a social media challenge, asking cupcake lovers to show off their treats and tag your bakery. Whatever additional content you choose to put on your labels, make sure it’s authentic and resonates with your brand. Are All Cupcake Packaging Labels the Same? There’s no shortage of options for cupcake labels. However, they aren’t all the same. Some printers use different materials or have limited options. We use 3M graphic vinyl, which is one of the most durable available. It’s weatherproof, moisture-resistant, and still looks great through normal wear and tear because of its protective coating. The material makes all the difference. Regarding specs, you can choose from multiple shapes or die cut to a specific one. Finishes include matte or gloss. Size is completely up to you, as well. Elevate Your Cupcake Packaging Labels with Stickerbeat We offer affordable, high-quality labels for cupcakes to fit any need, supporting local bakeries and national chains. Explore all the possibilities and order your labels today.
Learn more